The Definitive Guide to SSH Authentication on GitLab
Posted on Thu 21 June 2018 in general • 3 min read
Introduction
While there are good instructions in GitLab's documentation that explain how to set up key-based SSH authentication, these instructions fall short of a clear, concise, and complete solution. In addition to this, if you wish to use multiple SSH identities for specific services or environments, there are even more hurdles to overcome.
This post will help you to set up SSH key-based login on GitLab, so you won't have to enter in your credentials every time you issue a git push, and so you can avoid the issues I encountered along the way.
Let's get started!
Generate an SSH Key
First, we need to generate an SSH key. We can do that with:
ssh-keygen -o -t rsa -b 4096 -C "foo"
This will prompt you to overwrite the key if you've already generated one. (That's okay!) If you already have an SSH key, use Ctrl-C or n to stop this process and proceed to the next step.
To generate a key specific to GitLab, use:
ssh-keygen -o -t rsa -b 4096 -f ~/.ssh/id_rsa.gitlab -v -C "foo"
This will generate a OpenSSH-formatted key pair, using a 4096-bit cipher. Note that you can replace foo something more helpful to you, be it your email address or anything that helps you identify the key; the -C flag in the command represents a comment. For that, I tend to use my machine name.
Import the SSH Key
Next, copy this to your clipboard with xclip. If you don't have xclip, install it with:
sudo apt install -y xclip
Then, copy the public key to your system clipboard wtih:
xclip -sel clip < ~/.ssh/id_rsa.gitlab.pub
This assumes that you're using a key created just for GitLab. If that's not the case, use xclip -sel clip < ~/.ssh/id_rsa.pub.
After this, you'll need to navigate to the SSH Keys section of your GitLab profile.
That page looks like this:
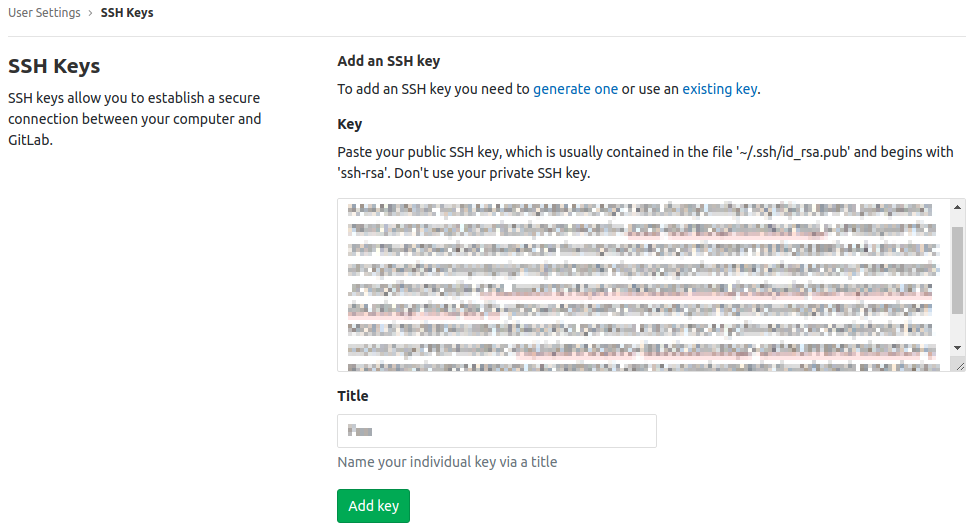
Yes, I know: I don't have to put a mosaic filter over the Key field, since it is, after all, a public key. It's okay to share, and that's the beauty of asymmetric encryption! Nonetheless, I've chosen not to publish it here. It's not for you!
Once on the SSH Keys page, paste your public key into the Key field and select the Add Key button. You've imported the SSH key! Wahoo!
Update your SSH Config
If you are using an SSH key specific to GitLab, you'll need to add this to your ~/.ssh/config file to tell ssh-agent which private key to use to authenticate.
Host gitlab.com
  User git
  Hostname gitlab.com
  IdentityFile ~/.ssh/id_rsa.gitlab
  Port 22
Again, this task is optional if you are using the default id_rsa key.
Update Git Remote Origins
If you've been working with GitLab for a while, you should issue the git remote -v command within each repository to review the origin remote and update it, if necessary. If this begins with "https", you will continue to be prompted for your username and password, despite having an SSH key set up.
In general, a remote like https://gitlab.com/foo/bar.git will become
git@gitlab.com:foo/bar.git.
To update the git repository's remote origin, use:
git remote set-url origin git@gitlab.com:foo/bar.git
...and it wouldn't hurt to verify that this change has taken place, with another git remote -v.
Test Your Connection
You can do a simple test wtih:
ssh -T git@gitlab.com
Or a more verbose test wtih:
ssh -Tv git@gitlab.com
If these fail, try this before heading to Google:
SSH_AUTH_SOCK=0 ssh git@gitlab.com
What does this do? What's SSH_AUTH_SOCK? It's an environment variable that holds the path to a Unix file socket that the ssh-agent process uses. If the top two tests failed, and this one passed, the GNOME Keyring SSH Agent is getting in the way of your terminal-based SSH agent. Let's disable it.
Disable the GNOME Keyring SSH Agent
You'll only want to try this if the first two tests in the last step failed, but the third one worked.
Disabling this key agent on Ubuntu is rather easy. To begin, use the Super key, and type in "startup". Wait a moment, and you'll see an entry called Startup Applications. Launch that.
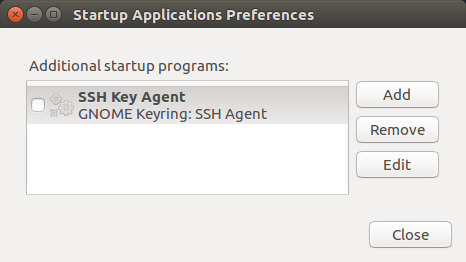
Untick the checkbox, and select the Close button. After this, log out and log back in, and you should be in business.
Happy coding, everyone!